

If you’re a golfer, whether seasoned or new to the sport, it’s crucial to wrap your golf club grip properly. This not only enhances your performance on the course but also adds a personalized touch. In this guide, I will share with you a step-by-step process on how to wrap a golf club like a pro. But before we delve into the nitty-gritty, let’s begin with an introduction.
Wrapping your golf club offers more than just style and personalization; it comes with practical benefits too. The right grip tape can significantly improve your control and stability during swings, ultimately enhancing your overall game. Additionally, by refreshing your club’s grip, you can prolong its lifespan and ensure it remains in excellent condition.
So whether you seek to replace an old worn-out grip or explore new materials for enhanced comfort and texture options – look no further! This article will provide all the information you need to find the perfect grip tape tailored specifically to meet your needs. Let’s get started on transforming your golfing experience!
Choosing the Right Grip Tape
When it comes to wrapping a golf club, choosing the right grip tape is essential. The grip tape you select will affect both the feel and performance of your club. In this section, we will explore two crucial factors to consider when choosing grip tape: texture and material, as well as thickness. Understanding these elements will help you make an informed decision for your next round on the course. So let’s dive in and discover what makes a great grip tape choice!
Thickness
When it comes to selecting the perfect golf club grip tape for wrapping your clubs, one key factor to consider is its thickness. The thickness of the tape plays a significant role in how your golf club feels and performs.
A thicker grip tape provides extra cushioning, reducing vibrations during swings. This gives you a secure and comfortable grip on the club. On the other hand, a thinner grip tape offers a firmer feel, allowing for greater control over your club’s movements.
Finding the right balance between thickness and personal preference is crucial. Some golfers prefer thicker grips for added comfort, while others choose thinner wraps to maximize control.
To determine the ideal thickness for your golf club grip tape, take into account factors such as your hand size, playing style, and personal preferences. Experimenting with different thickness options will help you discover the perfect match that suits your needs on the course.
In conclusion, selecting the optimum thickness of golf club grip tape is all about finding what brings you the utmost comfort and control. Through exploration and trial of various alternatives, you will ultimately unearth your preferred wrap thickness choice.
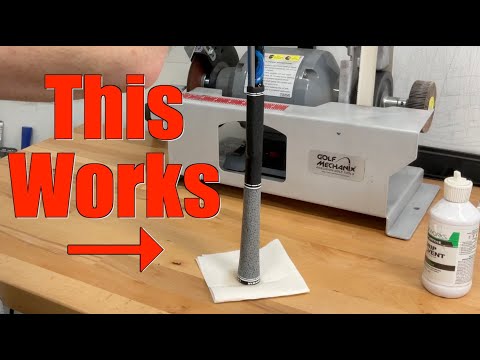
Preparing the Club
Once you have chosen the right grip tape for your golf club, the next step is to properly prepare the club before applying the new grip. This process involves two crucial steps: cleaning the club and removing the old grip. By taking these necessary measures, you will ensure a smooth and flawless application of the new grip. In this section, we will guide you through each step in detail, so let’s get started by cleaning the club .
Cleaning the Club
When hitting the links, it’s absolutely essential to make sure your golf club is in tip-top shape. And that means giving it a thorough cleaning before you put on a new grip. Trust me, it makes all the difference.
Before you dive into the cleaning process, gather up everything you’ll need: a soft cloth or towel, some warm water, and mild soap. Now, let’s get started. First things first, dampen your cloth with warm water and add just a tiny amount of soap. Then, take that cloth and give your club head a gentle wipe-down. Pay special attention to those grooves and crevices where dirt likes to hide.
Once you’re satisfied that every nook and cranny is clean, rinse off any soap residue with fresh water. Grab that towel again and gently pat your beloved club dry. Remember, don’t use any abrasive sponges or brushes – they could damage the precious finish.
By taking this extra step to thoroughly clean your golf club, you’ll ensure that your new grip has a squeaky-clean surface for optimal adhesion. And who doesn’t want their clubs performing at their absolute best? Plus, when you properly maintain your equipment like this, it’ll last longer too. So don’t even think about skipping this crucial step when prepping for grip replacement.
Removing the Old Grip
To remove the old grip from your golf club, there are a few simple steps you can follow. First, gather the necessary materials including a wrapping paper tube or cardboard cylinder, golf club grip removal solution, and a utility knife or hook blade.
Start by securing the club in a vice or clamp to keep it still during the removal process. Use the utility knife or hook blade to carefully cut through the grip, making small incisions along the length of the grip. Be cautious not to cut through the shaft as you do this.
Once you have made several cuts, slide the wrapping paper tube or cardboard cylinder between the grip and shaft to create some space. Then, begin twisting and pulling on the grip to loosen it from the shaft. If needed, apply some grip removal solution around the edges of the grip to further facilitate its removal.
Continue twisting and pulling until you are able to completely remove the old grip from the shaft. Clean any residue left behind using a cloth or brush soaked in warm soapy water or rubbing alcohol.
By following these steps, you’ll be able to easily remove your old golf club grip and prepare for installing a new one that fits your preferences perfectly.
Applying the Grip Tape
So, you’ve made the decision to go with the perfect grip tape for your golf club. Great choice! But now comes the important part: applying it correctly. This step is absolutely crucial when it comes to wrapping your golf club because it creates a solid foundation for a secure and comfortable grip. Don’t worry though, I’m here to guide you through the entire process. We’ll cover everything from measuring and cutting the tape to applying it like a pro on your club’s shaft. Get ready, because we’re about to ensure that your grip tape is flawlessly applied before we move on to installing the new grip in our next section. Let’s do this!
Measuring and Cutting the Tape
To ensure a proper grip installation, measuring and cutting the tape correctly is crucial. This step plays a significant role in achieving optimal results and enhancing your golfing experience.
Before you start, gather all the necessary equipment, including wrapping paper tubes or anything that can serve as a stable base for cutting the tape. Once you have everything ready, follow these simple steps to measure and cut the grip tape:
- Measure the length of your club’s shaft: Using a tape measure or ruler, carefully determine the length of your club’s shaft from the butt end to where the grip will be placed.
- Cut the grip tape: With the measurements in mind, use sharp scissors or a knife to cut an appropriate length of grip tape from the roll. Make sure to account for any overlap at both ends to ensure complete coverage.
- Wrap it tightly around a tube: To maintain stability while cutting, wrap one end of the tape tightly around a paper tube or anything with a similar shape and texture.
- Cut along one side: Holding this wrapped section securely, carefully slice along one side of the tape using your scissors or knife. This will create a straight edge for easier installation.
Remember that precision is key when measuring and cutting your grip tape. Taking time in this step will greatly contribute to successful golf club wrapping technique
Applying the Tape to the Shaft
To apply the grip tape to the shaft of your golf club, you’ll need to follow a few simple steps. Let’s dive into this crucial stage of wrapping a golf club.
First, measure and cut the tape according to the length of your club’s shaft. It’s essential to ensure that the tape is long enough to cover the entire area where you’ll be installing the new grip.
Once you have your tape ready, apply it smoothly and evenly along the length of the shaft. Start from one end and wrap it tightly as you go towards the other end. Make sure to leave a small space at both ends for adjustment during grip installation.
It’s important to note that applying grip tape requires proper precision and attention to detail. Aligning the tape properly will ensure a secure fit for your new golf club grip.
Continue following the next steps in our guide so that every aspect of wrapping your golf clubs receives proper attention!
Installing the New Grip
Alrighty, now that you’ve gone ahead and tidied up your trusty club and bid farewell to its worn out grip, it’s time to delve into the exciting realm of installing a spanking new one. And let me tell you, my friend, this step is absolutely vital because it’s going to determine just how dandy your club will feel in those beautiful hands of yours as you take a mighty swing.
So, in this delightful section, we’re going to hold your hand and guide you through the entire process of installing this snazzy new grip. We’ll walk you through the enchanting steps of adding some fine grip solvent, gracefully sliding that grip right onto the shaft, and ensuring it aligns with perfection. Ah, it’s truly exhilarating!
Now that we’ve set the stage for this riveting adventure, are you ready to dive right in? Great! Let’s begin this gripping journey together!
Adding Grip Solvent
To ensure a secure and long-lasting grip on your golf club, adding grip solvent is an essential step in the installation process. The use of grip solvent not only aids in the ease of sliding the new grip onto the shaft but also allows for proper alignment and prevents any air bubbles from forming.
Before applying the grip solvent, make sure that your work area is well-ventilated. You will need a small container to hold the solvent, such as a plastic cup or bowl. Soak one end of the double-sided grip tape with a generous amount of solvent, making sure to cover the entire length.
Next, carefully slide the new grip over the soaked portion of tape, starting from the bottom and gradually working your way up. This will allow for smooth installation while ensuring that no excess solvent spills out.
As you slide the grip onto the shaft, take note of its positioning and alignment. Make adjustments if necessary to ensure that it lines up correctly with any alignment markings on your club.
By using grip solvent during this step, you can achieve a tight and secure fit for your golf club grip. This additional measure enhances both comfort and control during your swing, providing an excellent feel that matches your personal preference.
Sliding the Grip onto the Shaft
Sliding the grip onto the shaft is a simple process that guarantees a snug attachment and optimal performance on the golf course. Here’s how I do it:
First, I prepare the grip by adding a bit of grip solvent to its inside. This smoothens the surface, making it easier for me to slide it onto the shaft.
Next, I position myself in such a way that I have a firm hold on both the shaft and the grip. Then, I align the bottom of the grip with the end of the shaft. Starting from there, I push or twist (depending on my preference) towards the clubhead with slow and steady movements.
Throughout this sliding motion, I make sure to apply even pressure and avoid sudden jerks or movements. This ensures that there are no unsightly wrinkles or gaps in my wrapping technique.
Once I’ve reached my desired position, I take a moment to double-check my alignment. The brand logo should be facing up towards me, while any alignment markings should be positioned as desired.
By following these steps, you’ll effortlessly slide your new golf club grip onto the shaft for a secure fit. Not only will it enhance comfort during your swing but also provide better control over your shots.
Aligning the Grip Properly
To ensure a comfortable and effective grip, it is crucial to align your golf club grip properly. Incorrect alignment can lead to inconsistent shots and discomfort during gameplay. When aligning the grip, there are a few key factors to consider.
Firstly, golf club grip preference plays a significant role in alignment. Some golfers prefer a square grip alignment, where the logo or alignment aids on the grip are facing directly towards their target line. Others may prefer a slightly open or closed alignment based on their swing tendencies or personal comfort.
Secondly, golf club grip installation requires attention to detail. Begin by lining up the butt end of the grip with the clubhead, making sure it is centered and parallel to the clubface. This ensures that your hands will be positioned correctly on impact.
Finally, when attaching the grip, use visual cues like golf club wrapping techniques or any built-in guide markings on the shaft and align them with your preferred hand position on the club. This will help you achieve consistent hand placement throughout your swing for improved control and accuracy.
By properly aligning your golf club grip, you can enhance your performance on the course and maintain steady shots round after round
Finalizing the Wrap
Once you have installed the new grip tape and placed the new grip onto the shaft, it’s time to move on to the final step of wrapping a golf club – finalizing the wrap. This step involves removing any excess tape and securely securing the grip end. In this chapter, we will provide you with detailed instructions on how to complete these final touches to ensure a professional-looking finish for your golf club. So let’s get started with finalizing the wrap!
Removing Excess Tape
Ensuring your golf club grip looks clean and professional is crucial after installing a new grip. This not only improves the aesthetic appeal of your club, but also prevents any discomfort or disruption during your swing.
Once you have applied the grip tape and installed the new grip, it’s essential to carefully examine both ends of the grip for any excess tape sticking out. If you observe any protruding tape, simply use a sharp utility knife or scissors to trim it away. However, be careful while trimming to avoid damaging the grip or exposing too much of the shaft.
After removing the excess tape, take a moment to properly secure the end of your grip. You can achieve this by wrapping a finishing ribbon or electrician’s tape tightly around the end of the grip. This not only adds a neat finishing touch but also guarantees that the end of your golf club is securely sealed.
By eliminating excess tape and effectively securing the end, you’ll have a sleek and comfortable golf club grip ready for your next game on the green!
Securing the Grip End
To ensure a secure and long-lasting grip on your golf club, it is important to properly secure the grip end. This step helps prevent the grip from loosening or shifting during your swings, giving you better control and consistency on the course.
- Removing Excess Tape: After sliding the grip onto the shaft and aligning it properly, there may be some excess tape sticking out at the end. Use a sharp utility knife or scissors to trim off any excess tape. Be careful not to cut into the shaft or damage the grip while doing this.
- Securing with Grip Tape: To firmly secure the end of the grip, take another piece of grip tape that is slightly wider than the shaft’s diameter. Start at one side of the end and wrap it tightly around, overlapping onto itself as you go.
- Applying Solvent: Apply a small amount of solvent to activate the adhesive on both ends of the grip tape. This will ensure a strong bond and prevent it from unraveling.
- Final Tip: Once you have securely wrapped and secured the grip end, allow some time for it to dry completely before using your golf club again.
By following these steps, you can confidently secure the grip end and enjoy a comfortable and reliable hold on your golf club throughout your game.
FAQ
Why is it important to wrap a golf club?
Wrapping a golf club helps provide a secure grip for better control and consistency in your swing. It also helps prevent slipping and twisting of the club during the swing.
Can I reuse the old grip tape?
It is recommended to remove the old grip tape and replace it with new grip tape. Reusing the old tape may not provide a secure and durable grip.
Do I need any special tools to wrap a golf club?
You will need a few basic tools, such as a utility knife or grip tape remover, grip solvent, a vise or club clamp, and a grip installation tool. These tools will make the process easier and more efficient.
How often should I replace my golf club grip?
Golf club grips should be replaced at least once a year or whenever they start to show signs of wear and tear. Regularly replacing the grip ensures optimal performance and comfort.
Can I wrap a golf club grip by myself or do I need professional help?
Wrapping a golf club grip can be done by yourself if you have the necessary tools and follow the proper instructions. However, if you are not confident or comfortable doing it yourself, you can seek professional help from a golf club repair shop or a golf instructor.
Conclusion
In conclusion, taking care of your golf club grip is essential for maintaining its performance and longevity. Properly cleaning and storing your grips can prevent the build-up of debris and extend their lifespan. Additionally, keeping an eye on the texture and comfort of your grips allows you to make informed decisions when it comes to replacing them with new ones.
When wrapping a golf club grip, it’s important to consider factors such as the type of tape used, thickness, and alignment. By choosing the right grip tape that suits your needs and preferences, you can enhance your grip on the club and optimize your swing.
Remember that the process of wrapping a golf club involves several steps, including cleaning the club, removing the old grip, applying the new grip tape accurately, and installing the new grip securely. Following these steps carefully will help ensure a successful grip replacement.
By investing time in maintaining and selecting appropriate grips for your golf clubs, you can enhance both comfort and control during your swings. So take care of your club grips regularly, explore different options available in terms of materials, textures, sizes, and brands; find what works best for you or surprise a golfer in your life with a thoughtful gift!