

When it comes to maximizing your golf club performance, every little detail makes a world of difference – and that’s where the shaft comes into play. The golf club’s shaft plays an absolutely crucial role in determining key characteristics like flex, weight, and length. So whether you’re seeking to add more distance to your shots, gain better control over your swings, or achieve unparalleled accuracy on the course, replacing your golf club shaft could be just what you need.
In this all-inclusive guide, we’ll walk you through each step of the process so that you can expertly swap out your golf club shaft. From gathering up all the right tools and equipment to carefully inserting and securely fastening the new shaft in place, consider us as your trusty companion throughout this journey. With our help, you’ll soon discover how this seemingly simple upgrade has the potential to propel your game to extraordinary heights!
Step-by-Step Guide: Golf Club Shaft Replacement
Hey there! I’m excited to share with you an easy-to-follow guide on replacing a golf club shaft. Whether you’re itching to upgrade your equipment or need to fix a broken shaft, I’ve got you covered every step of the way. So, let’s jump right in and transform your golf club into something exceptional!
First things first, make sure you have all the necessary equipment handy. To get started, grab your trusty wrench, a new shaft compatible with your club head, epoxy adhesive (check out this [link] for some great options), double-sided grip tape, and a vice clamp.
Now that we’re all set up, let’s begin the replacement process. Here are the steps:
- Safely secure your club: Place it in a vice clamp to ensure stability throughout the process. Safety first!
- Remove the old shaft: Using your wrench, gently loosen and take off any screws or attachments connecting the shaft to the club head.
- Apply heat: If you’ve got a graphite shaft or stubborn epoxy adhesive, use a heat gun on low settings to soften it up a bit. This will make removal easier.
- Carefully detach the old shaft: With gloves on for protection against any sharp edges, firmly grip the shaft near the club head and gently twist and pull away until it separates completely.
- Clean up: Take a moment to clean any leftover adhesive or residue from both the club head and hosel with some rubbing alcohol.
- Prep the new shaft: Before installing your fresh shaft, remove any protective coatings and measure its length against your old one for an accurate fit.
- Apply epoxy adhesive: Use small amounts of epoxy on both the tip of your new shaft and inside the hosel of your club head – this will ensure a secure bond between them (check out this [link] for best practices).
- Insert and align: Carefully slide your new shaft into the hosel, making sure it aligns properly with any existing markings on the club head. Give it a gentle twist to ensure the adhesive spreads evenly.
- Adjust the alignment: While the epoxy is still wet, double-check that your shaft is aligned correctly by looking at it from different angles. Make any necessary adjustments now to avoid regrets later.
- Let it set: Once satisfied with the alignment, let your newly installed shaft sit undisturbed for at least 24 hours. This ensures that the epoxy fully cures and provides maximum stability.
And
Step 1: Get the Right Equipment
First things first, before diving into the intricate process of replacing a golf club shaft, it’s crucial to make sure you have the right equipment on hand. Equipping yourself with the appropriate tools not only simplifies the task at hand but also guarantees a successful replacement. Let’s take a look at some essential items you’ll need:
- Golf Club Shaft Extensions: These nifty devices are just what you need to adjust the length of your shaft and personalize your club according to your swing style.
- Golf Club Shaft Weight: Each weight variation has a significant impact on your game, so having an assortment of weights available allows you to fine-tune and optimize your clubs.
- Golf Club Shaft Removal Tool: This tool is specifically designed to safely and delicately extract the old shaft from the clubhead without causing any damage.
- Golf Club Shaft Gripping Kit: Installing a new shaft requires a gripping kit to securely fasten it onto the clubhead.
- Golf Club Shaft Epoxy: This special adhesive is indispensable in establishing a robust bond between the shaft and the clubhead.
By ensuring that these essential tools are within reach, you’ll be fully equipped and ready to confidently embark on the first step of replacing a golf club shaft!
Step 2: Remove the Old Shaft
To begin the process of replacing a golf club shaft, you’ll need to remove the old shaft. This step is crucial as it ensures a clean and smooth transition to the new shaft.
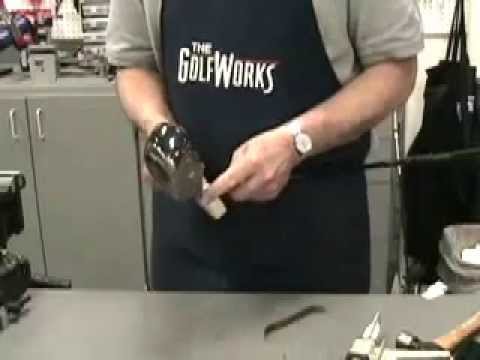
First, gather all the necessary tools such as a heat gun, rubber mallet, vise grip pliers, and epoxy solvent. These tools will make the removal process easier and more efficient.
Next, secure the clubhead in a vise to provide stability while working on it. Apply heat to the hosel area using a heat gun, which will help loosen the epoxy bond holding the old shaft in place. Rotate and apply pressure gently until you can wiggle the head of the golf club.
Once you’ve loosened the bond between the shaft and hosel, hold onto the clubhead with vise grip pliers and carefully twist and pull to remove the old shaft completely.
It’s important to handle this step with care to avoid damaging either the clubhead or yourself during removal. Remember that patience is key when removing an old golf club shaft!
Step 3: Prepare the Clubhead
To properly prepare the clubhead for a new golf club shaft, there are a few essential steps you need to follow. These steps will ensure that your replacement shaft is securely installed and will perform optimally on the course.
First, clean the hosel area of the clubhead by removing any dirt or debris. This can be done using a small brush or cloth. Cleaning the hosel ensures that the new shaft will bond well with the clubhead.
Next, check the ferrule (the plastic piece at the top of the hosel) for any damage or wear. If necessary, replace it with a new one to ensure a tight fit between the shaft and the clubhead.
After that, apply epoxy adhesive to both the inside of the hosel and outside of the tip of your new shaft. Make sure to evenly coat these areas for proper bonding.
Once you have applied epoxy, insert the new shaft into the hosel, making sure it is aligned correctly according to your desired club specifications.
Lastly, wipe off any excess epoxy that may have squeezed out during insertion using a cloth or paper towel. Leaving excess epoxy can affect both aesthetics and performance.
Following these preparation steps will set you up for success in replacing your golf club shaft and optimizing your game on the course.
Step 4: Insert the New Shaft
Once you have removed the old shaft, it’s time to insert the new one. This step is crucial in ensuring that your golf club performs optimally and meets your specific requirements. When inserting the new shaft, consider factors such as golf club shaft length, shaft flexibility, and shaft material to achieve a customized feel.
Before inserting the new shaft, you may need to apply some epoxy or adhesive to ensure a secure fit. Make sure to follow the manufacturer’s instructions for proper bonding. Once ready, carefully align the tip of the new shaft with the hosel of the clubhead. Gently push the shaft into place, making sure not to force it.
Take note of any alignment marks or indicators on both the shaft and clubhead, as this will help ensure proper orientation. Allow sufficient time for any adhesive used to set and cure before moving on to the final step.
Next up: Step 5 – Let the Shaft Cool and Set.
Step 5: Let the Shaft Cool and Set
Once you have successfully inserted the new golf club shaft, it’s important to let it cool and set properly. This crucial step ensures that the shaft is securely bonded with the clubhead, allowing for optimal performance on the course.
To begin, make sure that the clubhead is properly aligned and in position. Then, using a golf club shaft bonding agent, apply a thin layer along the base of the shaft where it meets the hosel. This adhesive helps create a strong bond between the two components.
After applying the bonding agent, allow sufficient time for it to dry and cure according to the manufacturer’s instructions. This process typically takes around 24 hours, but be sure to consult the product label for accurate timing.
During this waiting period, it’s important to avoid placing any unnecessary stress or pressure on the golf club. Find a safe and secure place to store it while waiting for the bonding agent to fully set.
By following these steps and allowing ample time for the shaft to cool and set, you can ensure a reliable connection between your golf club shaft and its respective clubhead.
FAQs About Golf Club Shaft Replacement
Do I need special tools to replace a golf club shaft?
Yes, you will need a heat gun, a shaft extractor, epoxy adhesive, grip solvent, and a vise.
Can I replace a golf club shaft myself?
Yes, with the right tools and instructions, you can replace a golf club shaft yourself.
How do I remove the old shaft?
To remove the old shaft, you will need to heat the hosel with a heat gun, use a shaft extractor to pull the shaft out, and clean off any remaining epoxy.
What should I do to prepare the clubhead for the new shaft?
To prepare the clubhead, you should clean the inside of the hosel, apply epoxy adhesive, and twist the new shaft into place.
How long should I let the shaft cool and set?
It is recommended to let the shaft cool for at least 30 minutes before using the club.
Conclusion
When it comes to golf club shaft replacement, there are a few key takeaways to keep in mind. First, selecting the right golf club shaft is essential for optimizing your game. Take into consideration factors such as shaft flex, material, and technology. Next, be sure to have the proper tools and equipment for the job, including a shaft extractor and a reliable adhesive for securing the new shaft. Lastly, remember that the process of replacing a golf club shaft requires precision and care. It’s important to follow each step thoroughly and seek professional assistance if needed. By following these guidelines, you can successfully complete a golf club shaft replacement and enjoy improved performance on the course.
Final Thoughts
In my opinion, replacing a golf club shaft is a great way to upgrade your golf equipment and improve your game. I have provided a step-by-step guide in this article that will help you easily replace a golf club shaft with the right equipment and proper technique. Make sure to consider factors like shaft material, flex, and customization options that align with your playing style. It’s also essential to regularly maintain and care for your golf club shafts to ensure their longevity and performance.
Whether you’re seeking better control, increased distance, or enhanced accuracy, selecting the right golf club shaft can truly make a significant difference in your game. So don’t hesitate to explore the various options and brands available in the market to find the perfect fit for your needs.
So why wait? Start exploring now and happy golfing!