

Okay, folks, let’s kick things off with a little crash course on the amazing wonders of a golf brush. Before we jump into the nitty-gritty details in our step-by-step guide and maintenance tips, allow me to introduce this game-changing tool and shed some light on its marvelous benefits. Brace yourselves for an enlightening journey ahead!
What is a Golf Brush?
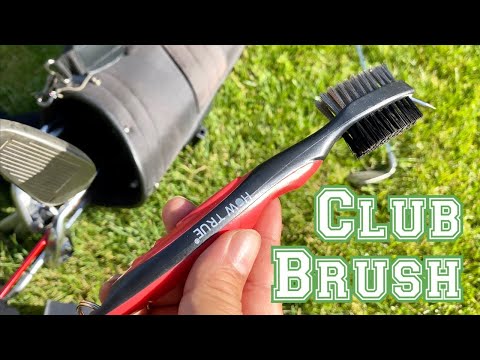
As a golfer, I can’t stress enough how important it is to have a golf brush in your kit. It’s simply a must-have tool that ensures your golf clubs stay clean and in top-notch condition. This handy brush boasts a strong handle and bristles, crafted from materials like brass, nylon, or wire.
Why is it so crucial? Well, its main task is to banish any dirt, grass stains, mud, or annoying debris that accumulate on the club face, grooves, and shaft while you play. Rest assured – the bristles are delicately designed to efficiently clean your clubs without causing any harm to their impeccable finish or optimal performance.
But wait, there’s more! Some golf brushes come with fantastic additional features that heighten their usefulness. You might find one with a groove cleaner or even a retractable design for easy portability. These fantastic extras further enhance your ability to keep your beloved clubs spotless and performing at their absolute best.
All in all, having a trusty golf brush by your side is an absolute game-changer. It guarantees the longevity and peak performance of your prized golf clubs. So don’t delay – get yourself one now and thank me later!
Benefits of Using a Golf Brush
Firstly, a clean golf club can have a significant impact on the performance of your shots. The grooves on the clubface play a crucial role in generating spin and control. When these grooves are dirty or clogged, it can lead to reduced spin and accuracy. By using a golf brush to clean the grooves, you ensure that they are free from debris and dirt, allowing for optimal contact with the ball.
Another benefit is that a clean club helps maintain the durability of your golf equipment. Dirt, grass, and other substances accumulated on your club over time can cause wear and tear if left unattended. Regularly cleaning your clubs with a golf brush helps to prevent scratches and surface damage, ensuring that they last longer.
Furthermore, using a golf brush allows for better visual alignment during shots. A clean clubhead makes it easier to line up properly since any marks or dirt won’t interfere with your aim. Additionally, some brushes come in different colors or have features like ball markers attached to them, providing added convenience on the course.
In conclusion, golf brushes offer multiple advantages such as enhanced shot performance, equipment durability, improved visual alignment, and convenient features. Incorporating regular cleaning using a reliable golf brush into your routine will help you maintain the quality of your clubs and potentially improve your game.
Step-by-Step Guide to Using a Golf Brush
So, now that you’ve grasped the concept of what a golf brush is and discovered all the perks it brings, let’s plunge right into a comprehensive walkthrough on effectively utilizing this game-enhancing tool. This step-by-step guide will meticulously lead you through every phase of the cleansing ritual – from prepping your beloved golf brush to thoroughly rinsing and efficiently drying it afterward. By adhering to these straightforward instructions, rest assured that your beloved clubs will remain in tiptop shape, ensuring an elevated performance on the course.
Step 1: Prepare Your Golf Brush
To begin using your golf brush, it’s important to properly prepare it. By following these simple steps, you can ensure that your brush is ready for effective cleaning:
- Inspect the Brush: Before you start cleaning, take a moment to inspect your golf brush. Ensure that the bristles are clean, intact, and in good condition. If you notice any damage or excessive wear, consider replacing the brush for optimal performance.
- Choose the Right Brush: Select a brush that is suitable for cleaning different parts of your golf club. Look for one with nylon bristles for gentle yet effective cleaning of club heads and shafts. Additionally, having brass bristles or wire brushes can be useful for tackling stubborn dirt in the grooves.
- Attach or Prepare Any Accessories: Some golf brushes come with additional accessories such as retractable groove cleaners or carabiners for easy attachment to your golf bag or belt loop. Make sure these accessories are securely attached before using them during the cleaning process.
By properly preparing your golf brush, you set yourself up for success in maintaining clean clubs throughout your rounds. So take a moment to give your brush a quick inspection and get it ready for action!
Step 2: Clean the Golf Club Heads
To truly elevate my game on the golf course, it is absolutely vital that I maintain clean club heads. Not only does this prolong their lifespan, but it also greatly enhances their ability to strike the ball with precision and power. Allow me to share with you a detailed, step-by-step tutorial on how I effectively restore my golf club heads using a specialized brush.
Firstly, I like to get things started by moistening the bristles of my golf brush and then applying a small dollop of dish soap for thorough cleansing. Next, armed with my trusty brush, I exert gentle but firm circular motions all over the face of each club head. This meticulous approach allows me to meticulously remove any accumulated dirt or debris that may have clung onto the surface.
For those more stubborn stains or persistent residue that might pose a challenge, as part of my cleaning regimen, I resort to utilizing the nylon brush attachment found on my golf brush. It offers a bit more oomph in terms of removing grime without harming the delicate finish of my cherished clubs.
Once each and every club head has undergone this rigorous scrubbing process, it’s time for a refreshing rinse under warm water. This rinses away any remnants of soap or stubborn grime that may still linger. Finally, before progressing further in this maintenance journey, I make sure to carefully dry off each club head using an absorbent towel or soft cloth ensuring they are completely dry.
Implementing this straightforward yet highly effective cleaning ritual into your regular maintenance routine undoubtedly contributes significantly to enhancing both the performance and longevity of your treasured golf clubs—making each shot cleaner and purer during every single round you play.
Give your clubs some TLC today: Get yourself a high-quality golf brush
Step 3: Clean the Golf Club Grooves

To ensure optimal performance and maintain the longevity of your golf clubs, it is essential to clean the grooves regularly. The grooves on your club face help generate spin and control, making them crucial for accurate shots. When dirt, grass, or debris fills these grooves, it can significantly impact your game.
Start by using a golf club brush with nylon bristles or brass bristles to clean the grooves thoroughly. With its small size and narrow tip, the brush can reach deep into the grooves and remove any dirt or residue that may have accumulated.
Ensure you brush both horizontally and vertically along each groove to dislodge any stubborn debris. It’s recommended to use short strokes and moderate pressure to avoid damaging the club face.
Once you’ve cleaned all the grooves, wipe the club face with a damp towel or rinse it under running water to remove any remaining dirt or cleaning product. Finally, use a dry towel to pat dry the club face before moving on to other cleaning steps.
By keeping your golf club grooves clean, you’ll enhance spin control and achieve consistent ball striking, resulting in better accuracy on every shot.
Step 4: Clean the Golf Club Shafts
To ensure that your golf clubs are in the best possible condition, it’s important to clean not only the club heads and grooves but also the shafts. The shafts of your golf clubs can accumulate dirt, debris, and sweat from your hands during a round of golf. Cleaning them will help maintain their performance and prolong their lifespan.
- Prepare Your Golf Brush: Make sure you have a golf brush with nylon or bristle brushes specifically designed for cleaning golf equipment. These brushes often come with different features such as retractability and easy access clips to attach them to your golf bag for convenience.
- Brush away Dirt and Debris: Use the bristle or nylon brush head of the golf brush to gently scrub the shaft of each club. Pay attention to any areas where there is visible dirt or grime buildup. Be careful not to apply too much pressure that may scratch or damage the surface of the club shaft.
- Use Golf Club Cleaning Solution (Optional) : If there are stubborn stains or marks on the shaft, you can use a mild golf club cleaning solution along with your brush for added effectiveness. Apply a small amount of the solution onto the brush and continue brushing until the stains are removed.
- Rinse and Dry: After brushing, rinse off any residue from both the club shafts and the brush under running water. Once cleaned, use a towel to dry both before moving on to other maintenance tasks.
Remember, regular cleaning of your golf club shafts is essential for proper maintenance and performance. By following these steps, you can keep your clubs in top shape for many rounds to come!
Step 5: Rinse and Dry the Golf Brush
So, you’ve got yourself a golf brush and you want to make sure it lasts a long time and keeps doing its job well. Well then, my friend, I’m here to tell you just how to do that. Stick with me and follow this handy step-by-step guide:
- Rinse: Alright, first things first. After giving your golf clubs a good scrub, grab that trusty brush of yours and hold it under some running water. Give it a nice rinse to get rid of any leftover dirt or debris. Oh, and don’t forget to say goodbye to any lingering soap suds too.
- Shake: Now it’s time for a little shake-down. Gently give your brush a shake to get rid of any excess water clinging onto those bristles. This simple action will help speed up the drying process, my friend.
- Pat Dry: Alright, grab yourself a clean towel (preferably not one you used on those nasty shoes) and start patting those bristles dry. Give them a good rub down to remove any leftover moisture and prevent any mold or mildew from making themselves cozy.
- Air Dry: Time for some fresh air! Find yourself an open spot with good airflow and leave your golf brush there to air dry completely. Avoid stashing it away in some closed container or bag while it’s still damp – that’ll just give those pesky bacteria all the reasons they need to throw a party.
And there you have it! By keeping your golf brush squeaky clean and bone dry, you’ll ensure top-notch performance every single time you reach for it on the green. So why wait? Make rinsing and drying your golf brush part of your post-round routine so that it’s primed and ready for your next swing.
Golf Brush Maintenance Tips
After learning how to use a golf brush effectively, it’s important to understand how to maintain and take care of your golf brush. Proper maintenance can help prolong the lifespan of your brush and ensure optimal performance on the course. In this section, we will provide you with some essential golf brush maintenance tips. By following these tips, you can keep your brush in top shape and ready for cleaning your clubs whenever needed. So let’s dive in and explore the best practices for maintaining your golf brush.
Clean the Brush Regularly

Hey there! If you want to keep your golf brush in top shape and make sure it does its job well, it’s essential to give it a good cleaning every now and then. You see, over time, those bristles can collect dirt, debris, and gunk that can hinder their ability to properly clean your beloved golf clubs. Don’t worry though! Just follow these simple steps to keep your brush squeaky clean:
- Shake off any loose dirt: A gentle tap against a hard surface or using your hand should do the trick in getting rid of any visible dirt or debris hanging onto those bristles.
- Give it a soapy bath: Fill up a bowl or sink with warm water and add a dash of mild soap. Take the brush for a little dip in the soapy goodness, ensuring you cover all the bristles, and giving them a gentle swirl.
- Rinse until it’s spotless: Time for a little rinse under some running water to wash away any leftover soap residue.
- Let it chill out: Give your brush a little shake to get rid of excess water, then find a well-ventilated area where it can air dry completely before its next mission on the golf course.
By making sure you clean your golf brush regularly, you’ll not only keep it functioning at its best but also ensure that each time you swing on the fairway, those clubs of yours get properly cleaned as well. Happy golfing!
Store the Brush Properly
To keep my golf brush in tip-top shape, I’ve found that proper storage is key. Here are some helpful tips I follow:
- Dry it out: After giving my golf brush a good cleaning, I always make sure to let it fully dry before putting it away. Moisture can be a real bristle buzzkill, leading to mold growth and damaging its performance.
- Find a clean nook: In my golf bag or equipment storage area, I search for a nice, clean spot to stow away my brush. It’s crucial to avoid storing it where dirt, dust, or other unwanted bits could sneak in and get transferred onto my precious clubs.
- Give it some cover: To protect the bristles from any damage or deformities, I take the extra step of using a protective cover or case for my golf brush. This little act helps preserve its shape and cleanliness over time.
- Avoid major temperature swings: I try my best to keep my golf brush away from extreme temperatures – too hot or too cold – as they might wreak havoc on its construction materials. Storing it in a temperature-controlled environment ensures its durability.
By following these straightforward storage tips, not only do I keep my golf brush in great condition for future use, but I also maintain the cleanliness of my trusty clubs throughout their lifespan.
FAQ
What is a golf brush?
A golf brush is a small tool designed to clean golf clubs.
What are the benefits of using a golf brush?
Using a golf brush helps to remove dirt, grass, and debris from golf club heads, grooves, and shafts. It can improve the performance and lifespan of your golf clubs.
How do I prepare my golf brush?
To prepare your golf brush, make sure it is clean and dry before using it. You can also dampen the bristles slightly if desired.
How do I clean the golf club heads?
To clean the golf club heads, apply some water or golf club cleaner to the brush bristles and scrub the club heads in a circular motion. Rinse with water afterward.
How do I clean the golf club grooves?
To clean the golf club grooves, use the pointed tip of the brush to remove dirt and debris from the grooves. Make sure to brush the grooves in a downward motion to avoid damaging them.
How do I clean the golf club shafts?
To clean the golf club shafts, simply run the brush along the length of the shaft, applying gentle pressure. Pay extra attention to any grip areas or textured surfaces.
How do I rinse and dry the golf brush?
After cleaning your golf clubs, rinse the brush with water to remove any remaining dirt or cleaner. Shake off any excess water and let the brush air dry before storing.
How frequently should I clean the brush?
It is recommended to clean the golf brush after every round or practice session to ensure optimal performance.
How should I store the golf brush?
To properly store the golf brush, make sure it is completely dry before storing it in a clean and dry place. Avoid leaving it in a damp or dirty environment.